Another old appliance (microwave) repaired

A T • November 19, 2018

This time, a microwave over 30 years old. I fixed it!

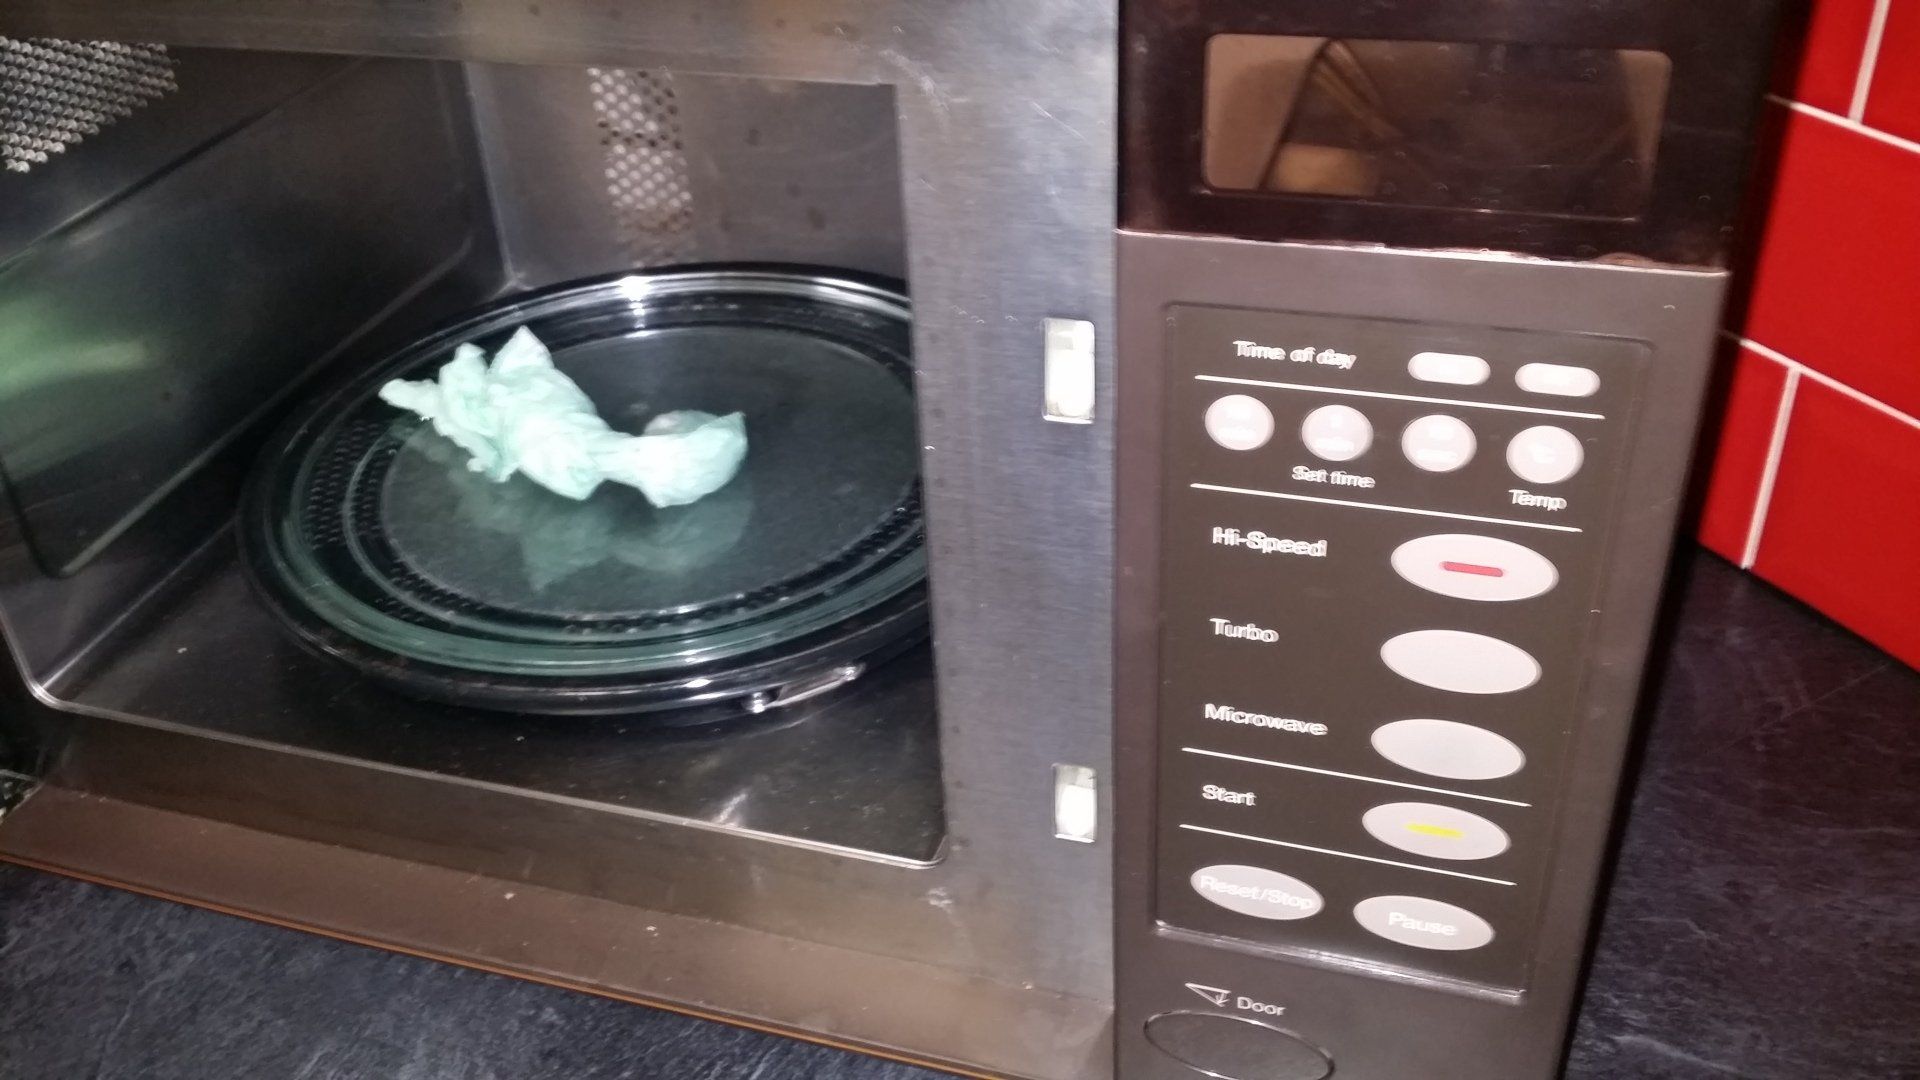
I went to a very old Brother microwave. It was completely dead. The display did not light up and there were no signs of life.

I checked that power was reaching the printed circuit board for the display panel, and found that it was. The display PCB had failed. Being well over 30 years old, there was no possibility of obtaining a new PCB, but the customer was really keen to get this microwave repaired as she had used it from new and was used to it. I explained that parts were no longer available but I suggested that I would take the PCB away and see if I could do anything with it. I further explained that if I was unable to repair it, there would be no charge whatsoever.

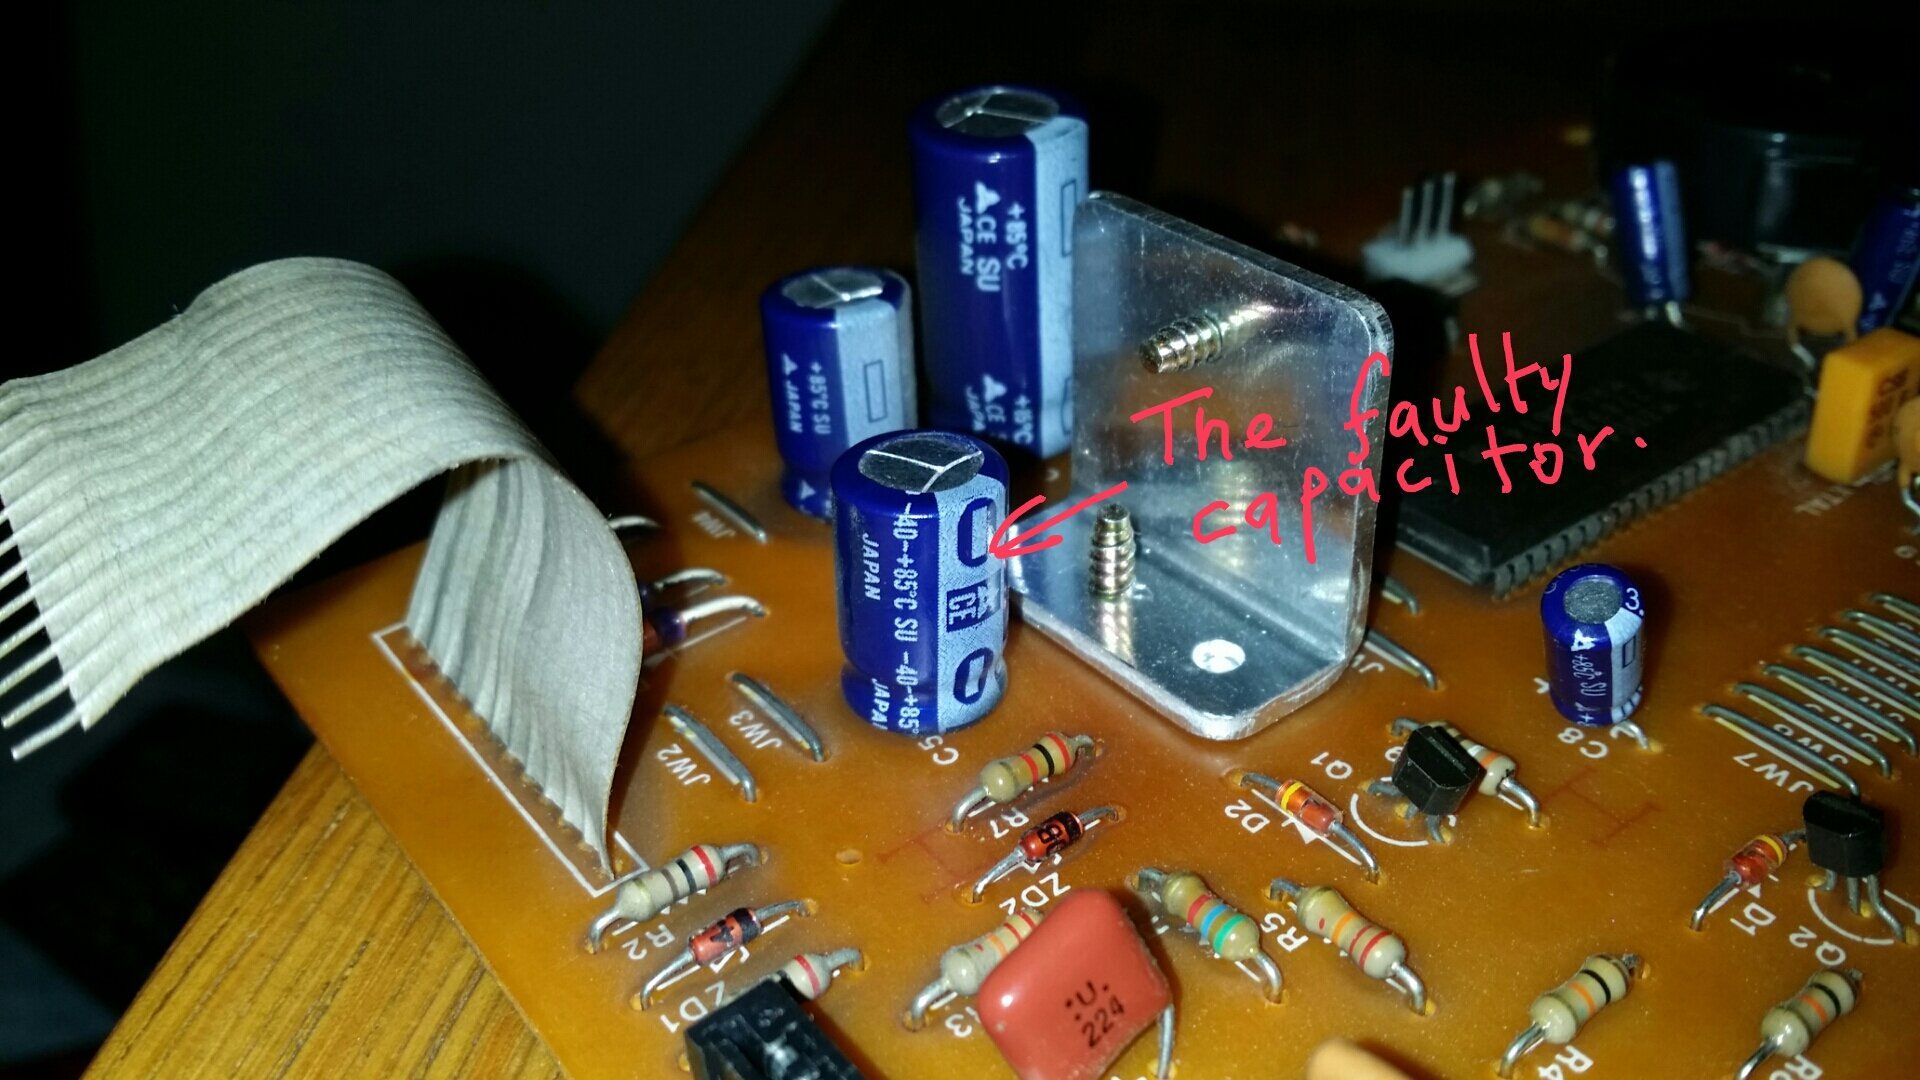
On checking the PCB, I noticed a darkening of the area around a group of components (electrolytic capacitors) and I tested each of them using a capacitance meter. One of them had failed as I got no reading when probed.

I ordered a new capacitor and soldered it onto the board. I went back to the customer with the PCB and explained that I hoped that this would work, but if not, she would have to obtain a new microwave. I wasn't particularly confident that this would actually work but it was worth a try.

I fitted the PCB back into the microwave and made all the electrical connections. To my relief, the display immediately came to life, and the microwave was back in operation.

The parts cost was just a small capacitor so a very cost-effective repair to a microwave that I thought would need to be scrapped, and a customer who got her trusty microwave back!

The majority of appliance repair companies would not repair an appliance to component level, and had parts been available, I would have changed the complete PCB. It was a bit of a different repair to normal but I'm really pleased that it worked out.


By A T October 9, 2023
Searching for the elusive sensor....
October 19, 2022
Your dishwasher does a pre-wash, and adding detergent for this phase results in a better wash.
By A T November 4, 2021
A repair set is available for this fault but it's very difficult to fit!
By A T May 10, 2021
Circuit boards can often be expensive. When a circuit board fails, replacing it can often make a repair uneconomical due to the sometimes high cost of the board. Most appliance repair companies simply order a new board and replace it as they do not repair down to component level. However, whenever possible, I can offer the option of repairing the circuit board by replacing some of the on-board components, or alternatively, they can be sent off for repair. A board repair can cost a fraction of replacing it, saving you a considerable amount of money.
By A T February 9, 2020
Well, ultimately, it's to stop you from putting your hand into a washing machine at full spin (very dangerous), but here's Just a brief explanation of how an old-fashioned washing machine door lock works. (One for the technical geeks who might be interested in this sort of thing!)
By A T February 2, 2020
On a previous blog post, I had to strip down a washing machine to get to a 'colour catcher' which had got stuck in the sump hose. I had a call to a washing machine last week which wasn't draining. On switching the machine to drain mode, all I could hear was a quiet hum from the pump, which was trying to run. I tipped the appliance back, drained out the water through the filter and found a 'colour catcher'wrapped around the pump impeller. Removing this rectified the fault. Another example of these useless items causing problems.
By A T January 29, 2020
Today, I visited a customer where it appeared that the dishwasher was leaking. Clean water was appearing beside a built-in dishwasher on an 'island' in a kitchen. This was a bespoke kitchen, with hand-built units. I couldn't pull out the dishwasher to thoroughly check out the cause due to the way that the fitters had installed it. It was fitted in such a way that the dishwasher could not be removed, as a wooden strut had been fitted across the dishwasher without any visible way of removing it. I was able to get to the back of the dishwasher through the opposite side of the island which had a cupboard under the island sink. It quickly became clear that the fault was not with the appliance itself, but with the pipework supplying it. The dishwasher supply pipework has a fitting that has a compression joint. This had a small bead of water above it which was causing a tiny leak. I'm not a plumber, but I got my grips and a spanner and tried to tighten this up but the nut didn't move at all. That's as far as I was willing to go with it as I had visions of the fitting splitting at full mains water pressure with no way of turning off the supply. I certainly didn't want to risk this so I had to advise the customer that they would need to get a plumber in to rectify the fault.
By A T January 22, 2020
My first blog post of 2020! Colour catchers. They cause problems! I've been to problems caused by these recent 'innovations' before. I recently went to a job in Kings Langley where the washing machine was failing to drain. On removing the sump hose, a collection of 'colour catchers' was found in the sump hose, stopping the water reaching the drain pump. You will notice from the photos that modern machines now have a ball in the sump hose. These are for saving energy. The ball rises when the appliance fills, sealing off the area beneath the tub. This means that the machine doesn't have to heat the water between the tub and the pump, saving energy! The ball, however, restricts the outflow of water from the drum, and it doesn't take much to collect around it to severely restrict the ability to drain. I really don't believe that these colour catchers actually do anything at all. They seem to change colour, but that isn't necessarily going to stop colours running since the colours will also run elsewhere! My advice, don't waste money buying these things. They may well end up costing you a visit to remove them!
By A T April 23, 2019
My number one dishwasher cleaning tip for these liquids - Don't put the cleaner in at the start! There are many proprietary dishwasher cleaners on the market which do a reasonable job of cleaning your dishwasher. However, if you don't follow the instructions carefully, you may not be getting a proper clean and may actually be wasting the product. Some of these cleaning products are approaching £5 a time, so it's a lot of money to pay out to then not get the benefit. The problem occurs if you put the cleaner in at the beginning of the cycle. These liquid cleaning products have a wax seal under the cap. When you remove the cap, you place the bottle upside down in the dishwasher and the wax seal keeps the cleaning fluid inside the bottle until the water heats up, the wax then melts and dispenses the cleaning liquid into the dishwasher so that it will circulate round the system for the full duration of the main wash. The idea is that the liquid should dispense after any cold pre-wash and get dispensed when the main (long) wash begins. The longest wash cycle should be used for this procedure. However, the longest cycle usually starts with a short HOT pre-wash. If the cleaner is put in at the beginning of the cycle, the liquid will be dispensed too early so it will only clean briefly during the pre-wash phase before being flushed away (around 10-20 minutes) and won't have had time to do a really thorough clean! A dishwasher cleaner needs to recirculate for a sufficient time to thoroughly clean out the system during the main part of the washing cycle. This comes after the short hot pre-wash and runs for a considerable length of time where the cleaning fluid gets to do a thorough job. The answer to this is to wait for the first part of the cycle (the hot prewash) to complete BEFORE introducing the dishwasher cleaner into the system. This can be achieved by simply waiting approximately 10-20 minutes into the cycle, (by then, it should have completed the pre-wash), or by observing when the pre-wash has finished by listening out for the water to drain before it fills up for the main part of the wash. Then add the cleaning product. (Open the door just a fraction and wait a second for the door latch to detect that the door has been opened and for wash action to stop if it has started washing again.) It's a really simple tip which will mean you're not wasting money on an ineffectual clean! Better still, get a cleaning and descaling powder and place it in the dispenser. The dispenser will open only on the main part of the wash so you won't have to hover around the dishwasher waiting for the first part of the cycle to complete. We can supply professional descaler/cleaning products.
Show More